Showing posts with label Potato. Show all posts

Monday, April 25, 2016

Mama Gray's Potato Rolls


Good morning!

First off, I want to apologize for not having an article up that past few weeks. I had some family and business matters that required more time and energy than I had anticipated. I can't go into details. But let's just say it involves my Grandmother and tax identity theft. The IRS takes this sort of thing very seriously, even if you are the victim. I have always been a firm believer, and I hope you feel this way too, that Jesus and family should always come above everything else. 

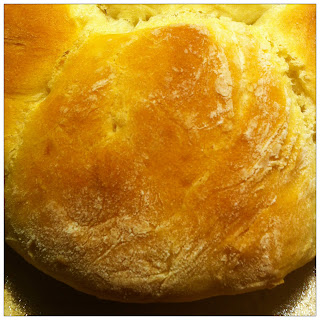
Speaking of family, today I want to share with you a very old family recipe. Mama Gray's Potato Rolls have been in my family for decades. We make them for just about every holiday meal, religious feast, and especially St. Patrick's Days. 

Before we get into everything, I want to share with you the secret to this recipe. Instead of using cold regular tap water, use the cooled water that you used to boil the potatoes in. I know it doesn't seem like much of a secret, but it makes all the difference!

Ingredients 


1 Tbs yeast
1 1/2 Cup water (use the cooled water that you used to boil the potatoes in. It makes a huge difference.)
1 Cup unseasoned mashed potato
2/3 Cup sugar
2/3 Oil
2 Eggs
1 1/2 Salt
6 to 7 Cups flour


Instructions


Peel and quarter 2 medium potatoes. Boil them in a small pot till they are soft. (Just like mashed potatoes.)

Once your potatoes are done separate the potatoes and water. Let them both cool. The water needs to be between 100 to 110°F any warmer, and it will kill the yeast. Any cooler and the yeast will not activate.


Mash the potatoes and measure out 1 cup.

In a large bowl mix water and yeast. Then add sugar, oil, eggs, and mashed potato. Mix them together with a fork.

Add 5 cups of flour. Mixing it in with your fork one cup at a time.

Then sprinkle one cup (this will be cup #6) of flour down on your clean cutting board (or clean counter-top). Put the bread mix on top of the flour. Then sprinkle cup #7 of flour on top of dough. You should have flour-bread-flour layers. Now knead.


Don't over knead. Just knead in the flour till the bread is smooth. Should take about 1 1/2 minutes.

Now take a large, clean bowl and put about 1 Tbs of oil in the bottom of the bowl.

Place your bread on top of the oil swirl it around, flip it and swirl it again.

Cover the bowl with a clean hand-towel. Put the bowl in a warm place let it rise for 1 1/2 hours.

After the time is up preheat over to 400°F.

Sprinkle a little flour on your clean cutting board or clean counter-top. Divide bread in half, then into fourths and so on until you reach 16.


Place into two greased pie pans. And place them in the oven. Turn down the temp to 350°F. Cook for 25 to 35 minutes.


Thank you for your patience and bearing with me. I promise I will try to be on time from now on!

Sunday, February 28, 2016

Homemade (Gluten-Free) Potato Soup


Good morning everyone! Hope your Sunday morning is more sunny and warm than mine is here in Northern Montana. Today I want to not only give you my Homemade (Gluten-Free) Potato Soup recipe, which I got from my mom, but I want to talk about an alternative cooking process that most people don't use. Pressure cooking with a Pressure Cooker, not it be confused with a Pressure Canner.

For those of you who may not know, a pressure cooker is an airtight pot in which food can be cooked quickly under steam pressure. You might be asking "Why get ANOTHER kitchen accessory when I can just boil in the pots I have?" By cooking the food quickly (with minimal water) under steam pressure, your food retains more of its nutrients, unlike when you boil it, where you are actually boiling the nutrients out as the food breaks down. In other words, The longer foods are cooked, the more nutrients goes into the water and inevitable down the drain. I personally find foods retain more of their taste as well. A couple bonus benefits to mention, pressure cooking saves time and energy resources. You can literally cook down tender veggies in 3 to 5 minutes or stew meat in 25 minutes.

Photo courtesy of Ace Hardware Site
If you want to try it out for yourself, you can pick one up at Walmart, Kmart, Target, I got mine at Ace Hardware for around $45.00. Mine is a 6 quart just like the one in the photo.

In the recipe below I will give you the directions on how to cook the veggies in a pressure cooker, but for those of you who may not have one...yet, I will give the instructions for traditional boiling as well.

Ingredients 

6 medium potatoes (doesn't matter whatever is on hand. Russets, Yukon golds, etc.)
1 onion, diced small
3 carrots, peeled and chopped small (or 1-1/2 of baby carrots chopped small, again whatever you have in hand)
5 cups chicken broth (canned, boxed or bullion, doesn't matter)
1/2 cup cornstarch
1 stick of butter
4 cups milk
2 cups shredded cheese (I use cheddar, but you could be adventurous try something different.)

Directions

(Pressure Cooker) Place your diced potatoes, carrots, and onion in your pressure cooker (make sure you have the cooking rack in the bottom before you put the veggies in.) Add 1 Cup of water and put the lid on. Now cooking time doesn't start till the pressure is built up, so don't start timing till the pressure regulator starts jiggling. Once it's jiggling turn it down to medium-low and time 5 minutes. After the 5 minutes is up, carefully pull the cooker off the stove and place it in your empty sink and run cold water over the top to cool it quickly. This next part is very important DO NOT REMOVE THE LID TILL THE PRESSURE HAS GONE COMPLETELY DOWN!  Mine has an air vent on the handle on the lid that goes up when under pressure and goes back down when the pressure is gone. Your's may be different, so PLEASE READ THE INSTRUCTIONS BEFORE USE! After you remove the lid drain and place in a large pot.

Right: Pressure Cooker Part Diagram -  Left: Cooking Rack

(Traditional Boiling) In a large pot, bring water, potatoes, carrots, and onion to a boil. Reduce heat, cover, and simmer for 20-30 minutes or until potatoes and carrots are tender. Then drain and put back in a large pot.

Meanwhile, in a medium saucepan, melt the butter, then whisk in the cornstarch.

Add the milk to the butter/cornstarch mixture and whisk together. Cook and stir until thickened and bubbly. It will start out thin but how you will know it's done is when it is the consistency of pudding.

Add cheddar cheese and stir until melted.
Pour cream base contents of medium saucepan into a large pot with your vegetables.

Heat thoroughly over medium heat, occasionally stirring, until ready to serve.

This recipe is very versatile, so you could always add some ham and/or corn and make it a chowder. You can basically swap and/or add whatever veggies you like to the cream base. I have added bacon before and let me tell you it is heavenly. Also if you want it to be a bit thicker add more cheese till you get the consistency. Like I usually add 3 or 4 cups of cheese, but mom likes it thinner, so she just adds 2 cups, which is more cost-effective. But who doesn't love super cheesy bacon potato soup!?

Also, one more thing to remember, this soup is GLUTEN-FREE! There is no flour in the base. It is thickened with cornstarch. Which makes it a good soup for anyone like my mom who can't eat gluten.