
Here are my step by step instructions on Boiling-Water Canning. Just a case you are looking at other instructions or references the term water bath canning is interchangeable with boiling-water canning.
Please note that some of the pictures I use are from when I pressure-canned chicken broth. No you cannot boiling-water can chicken broth but a number of the steps are the same.
Step 1: Get 7 quart jars check the rims for chips and wash them.


Step 2: Fill about half way up your 21-quart water bath canner (also called a boiling-water canner) and submerge your clean jars in it. Make sure you have about 1 inch of water above the rim of the jars
Step 3: Bring jars to a boil and boil for 10 minutes

Step 4: Meanwhile wash 7 rings, 7 new lids, and the utensils you are going to use.
Step 5: Set aside utensils to dry and place rings and lids into a large saucepan. Fill with water to about 1-2 inches above the rings. Boil for 10 minutes.


Once your all of your jars and lids are sterilized turn them on low. Next you are gonna want to set up your workstation. You will probably want to do it as close to your stove as you can. Cause you will be pulling jars/ lids out the pot, filling them, and putting them back into your water canner.
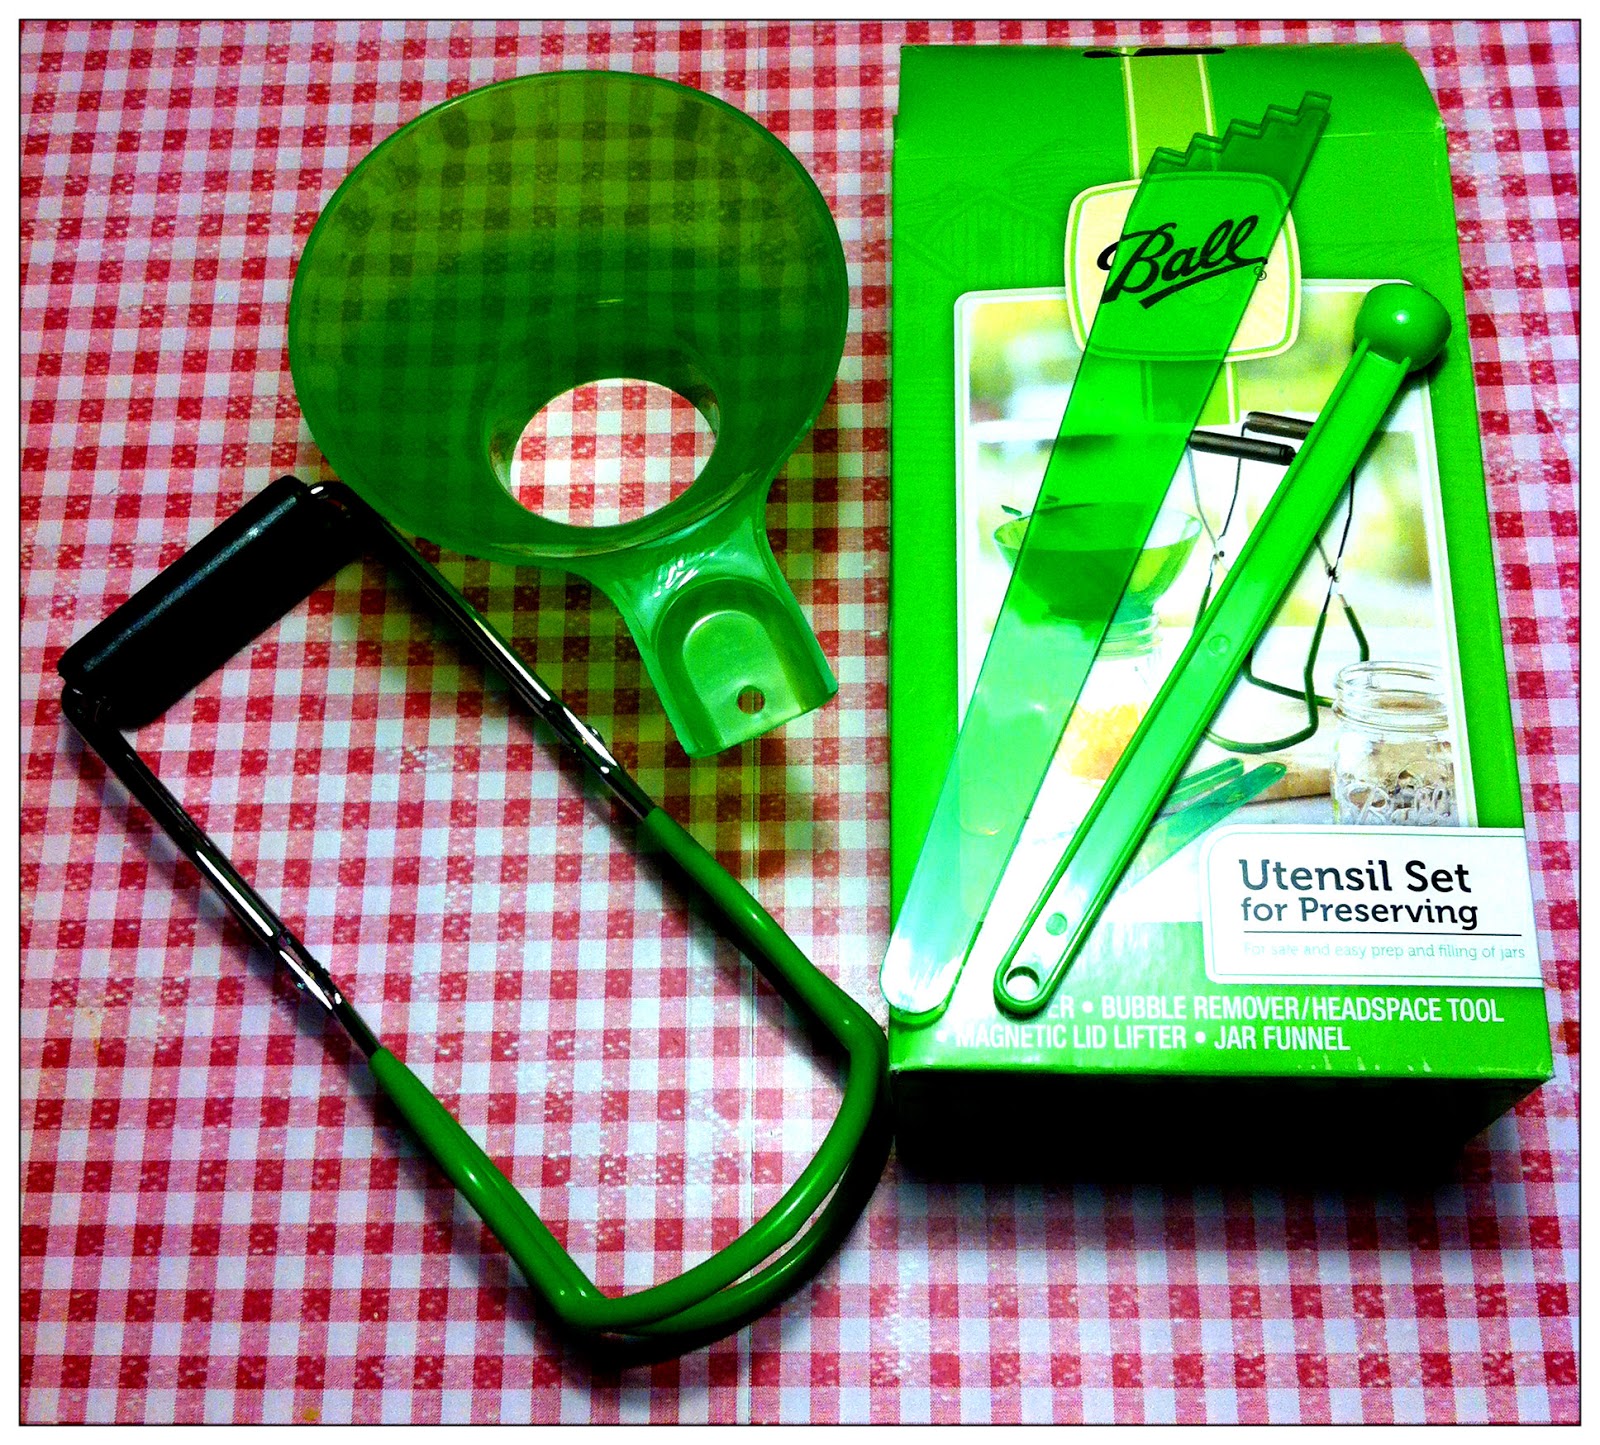
In the picture above are the canning tools I use. If you are not familiar with all of them or you don't have them, you can pick a set from just about anywhere (Walmart, Kmart, Ace Hardware, etc.) They around $10.00 and usually include at minimal: a jar funnel, jar lifter, magnetic lid lifter and bubble remover/headspace tool.
In the picture above are the canning tools I use. If you are not familiar with all of them or you don't have them, you can pick a set from just about anywhere (Walmart, Kmart, Ace Hardware, etc.) They around $10.00 and usually include at minimal: a jar funnel, jar lifter, magnetic lid lifter and bubble remover/headspace tool.
Step 7: Start filling your jars!
Make sure to leave about 1 inch to 1/2 inch of space from the rim of the jar. NEVER FILL THEM TO THE RIM. Because they will over boil and not seal. The headspace varies with the kind of food you are doing so please make sure to check or err on the side of caution and leave about an 1 inch.


Step 8: Remove any bubble by sticking your utensil down the inside edge of jar and adjusting the contents. Wipe the rim of each jar before put in the lid and ring. Place each finished jar into the water canner.


Step 9: Bring to a boil and time it. Please remember times vary with the food you are doing and the attitude you are at. So also check! Here is the attitude chart I use for my mom's Ball Blue Book.

Post canning jar care:
Step 1: After your time is up, take the jars out of the water canner place them on a towel in a non-drafty area. Your jars should seal as they cool. Don't touch them! You will hear them pop. If you are like me and worry, you can listen and count the pops. Now they say you should let them sit untouched for 24 hours but I always check to see if they have sealed after about 2 hours. That way I can put it the unsealed jar(s) in the refrigerator so I can reprocess it later. Just give the lids a light touch to see if they are sealed or if they still spring up and down. If they are not sealed place them in the refrigerator and reprocess them the next day. Remember though, that you will need a clean jar and brand-new lid. You can just reheat the same jar with the same lid.
Step 2: After the 24 hours are up you can remove the ring and give both the rings and the jars a nice washing.


Step 3: Make sure the jars (especially the rims/lids) and rings are dry before you put the rings back on. Once they are dry though you can label them and put them up. I just write on the lid, but you can also get dissoluble labels. I find a permanent marker is cheaper.

Now as with any food on your shelf you have to periodically check them and rotate them out. You will also want to keep the jars in a cool, dry, dark place. You don't ever want them in direct sunlight. In fact, it is best to store the jars between 50 and 70 °F. You also don't want to store the jars near hot pipes, a range, a furnace, in an un-insulated attic. Under these conditions, the food will lose quality within a few weeks to months and may even spoil. Dampness is also an enemy of your jars. The dampness can cause the metal lids to corrode which break the seals, and allow contamination and ultimately spoilage.
How long do the jars last? Well that is a question of great debate and one you will have to research and answer for yourself. I will tell you, The National Center for Home Food Preservation says 1 year. Now does that mean the food automatically goes bad on day 366? I personally have eaten food that was canned 5 to 10 years prior. Does that mean it was safe? I am still alive and didn't get sick. I have known folks who ate canned food 20 or more years old. They believed as long as the jars and seals are undamaged the food was still good. With whatever you decide, please err on the side of caution, check the seals, exam the food, if you think there is any chance that it isn't good throw it. Food poisoning is no fun and very dangerous.
Finally please remember that these are MY instructions for boiling water canning. Everybody does it a little different and while some people may be more or less strict, or use a different process, I encourage you to always do your research and have more then one reference. Read four or five different articles and if you have any doubt or questions consult The National Center for Home Food Preservation.
No comments:
Post a Comment